
Letterpress Artwork is not unlike artwork for silk screen seriography. It's all either black or white imaging. We call this "high contrast imaging". What I have started doing is using a media that is an old friend of mine, only now I am employing it another way.
Remember the venerable "Scratch Board" from High School Art Class? The very best was - and still is - india ink over a layer of chalky clay, laid as a layer over a firm base, such as tempered masonite. Nowadays they call it "Clayboard".
You can also find Clayboard in the form of white gessoed masonite, prepared for painters. Also, manufactures of black Clayboard are offering their product without the black india ink surface. And here is where my interest was peaqued.
So, about two years ago I purchased some of both coated and uncoated clayboard and endeavored to develop some sort of illustration technique to help me reach my goal of an absolute black and white art image that is easy to edit. So far, ink on white clayboard has been quite successul. Here is my latest example:

I drew this image first on bond paper, and using some carbon paper, transferred the image directly to the white clayboard (if you look close you can see the "blue" carbon lines still.) This is not unlike transfering an image onto linoleum for carving. I then used markers and india ink to fill in the 'silhouette'. The result is what you see above.

This is simply a close-up of the edge of the board, showing the tempered masonite backing. These boards are thin enough to be scanned safely on a flat-bed scanner for vector conversion.

Thought I might sneak this in. It's part of a project that I am working on, a series of Lombardic Filligree Caps. This will take a long time to do on clayboard, it's almost like hand engraving because you apply the ink, then you go back in with a blade or graver or needle to clean edges, add stippling or hatching or whatever technique you are employing. The difference is that when using a white board, it is less a matter of 'white on black' negative space thinking and visualizing, and more like executing a pen-and-ink piece. You might say you get in on some of the benefits of both worlds.

My image is then scanned, edited on the computer, then reversed. This particular illustration will be used for my future "Congratulations - you're on the Nest" card. This is the computer rendering, included the 18pt Open Caslon, of which I have as metal type.

A closer look. The paper stock will be Crane's Lettera, 300gsm, and the blue image will be debossed on the Kluge, causing the white to raise up, not unlike an embossed piece. In fact, this was how the old Postal Stationery Envelope Stamps were printed, using a pliable platen to force the paper into the print die. In my case, the die will be copper.

Close-up of the lettering. I love using Open Caslong for titling! And it helps to have a case of this type in 18 point upper and lower case with figs and numbers. I need to get another case in 24pt. As it is, this font that I have is over 100 years old, produced by ATF.
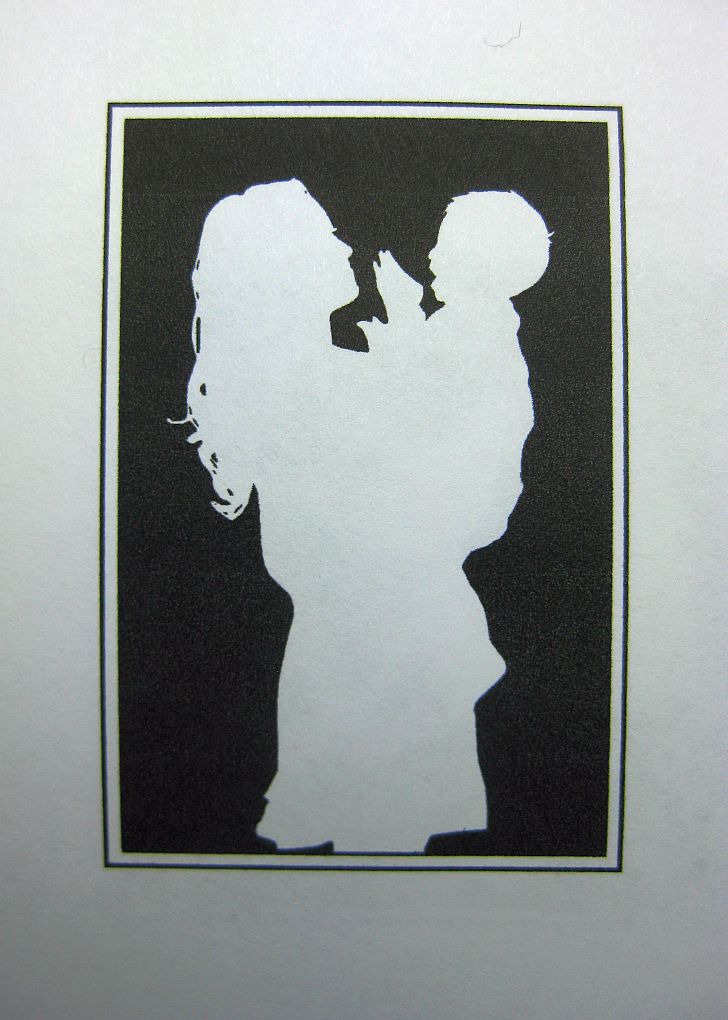
This is the parting shot, a 'cameo' of a mother and a very happy little boy. This will be used for a Mother's Day card - and for other appropriate events.
Well, folks, that's about it for this installment. I placed this article here on the Paper Wren Blog because, while it is sort of an education and information piece (which I would normally place on G. Johanson, Printer's blog) - it also describes one of our products, which I think makes it appropriate to place it here. Hope you enjoyed the narrative and photos, and gained a little behind-the-scenes insight in this part of the Letterpress Production Process.
Good Providence in all your endeavors!
-gary
No comments:
Post a Comment